1 Typography Settings
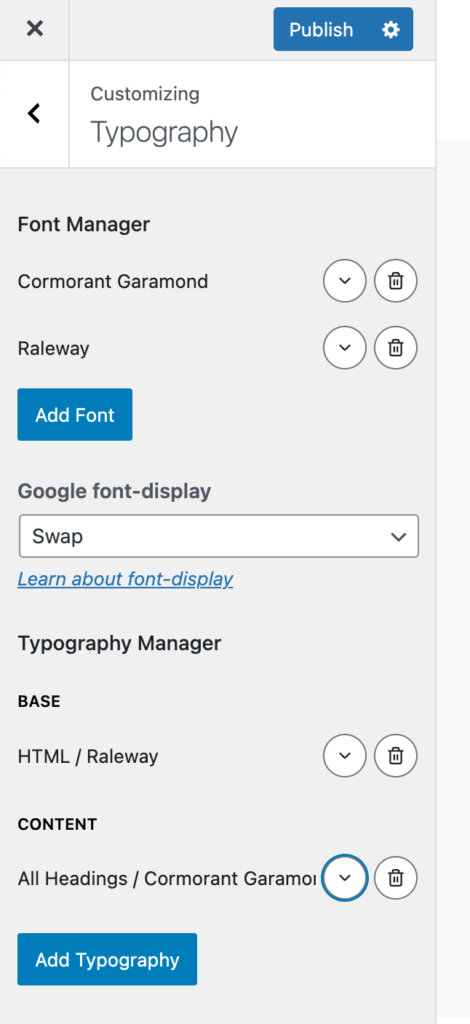
In WordPress Dashboard > Appearance > Customizer > Typography
Font manager:
Add 1 font (for all the headings): for example Cormorant Garamond,
uncheck ‘Use Google Fonts API’
Click on Add Font
Add 1 other font for the body text: for example Raleway
Google Font Display: Swap
Typography Manager:
Add Typography > Base > HTML > Font Family > Choose your body text (ex. Raleway)
Typography Manager:
Add Typography > Content > All Headings > Font Family > Choose your font for the headings (ex. Cormorant Garamond)
Click on Publish
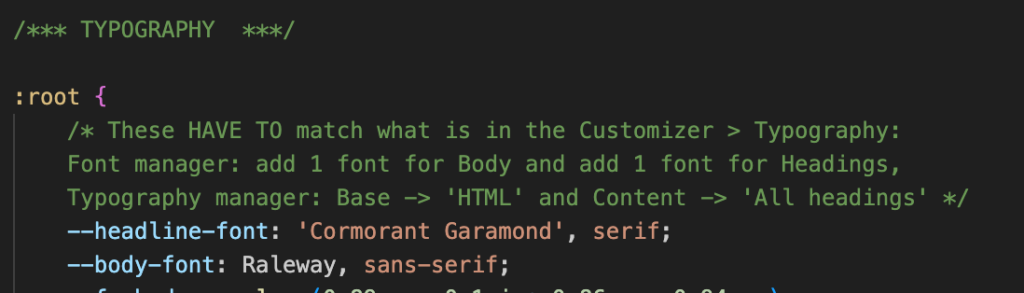
In your custom CSS file (my-style.css)
https://www.yourwebsite.com/css/my-style.css
Add the 2 names of your fonts
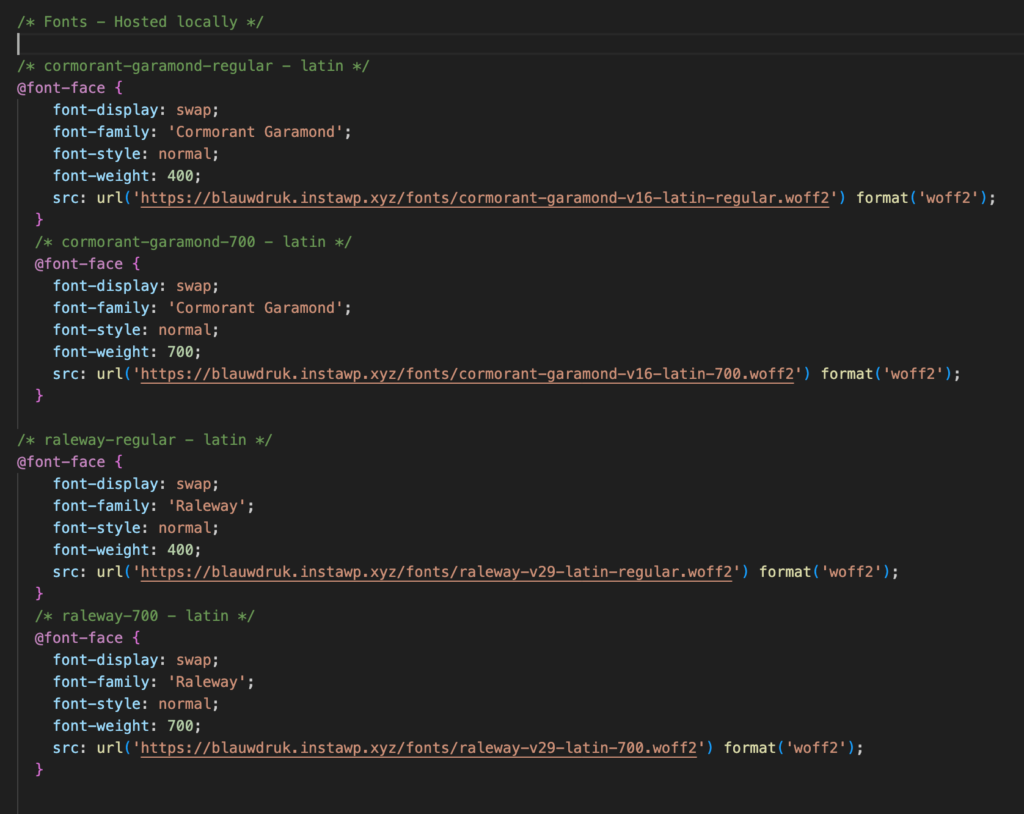
2 Host Fonts Locally
Hosting the fonts locally from your server and not from Google’s servers will improve the speed of your website. There is also no cookie permission (GDPR) required from the website visitor regarding the fonts.
Go to the Google Webfonts Helper tool at https://gwfh.mranftl.com/fonts
Search for your font.
Next, select the 2 styles weights:
only choose ‘regular’ (400) and ‘700’ (bold).
Scroll down to the “Download files” section and click the button to download the fonts.
Unzip this file so you have it ready to go. Only use Woff2 fonts!
Upload the fonts to your website (create a fonts folder) : www.yourwebsite.com/fonts/
Back in the Google Webfonts Helper: fill in the ‘Customize folder prefix’ field with: https://www.yourwebsite.com/fonts/
Now copy all the CSS
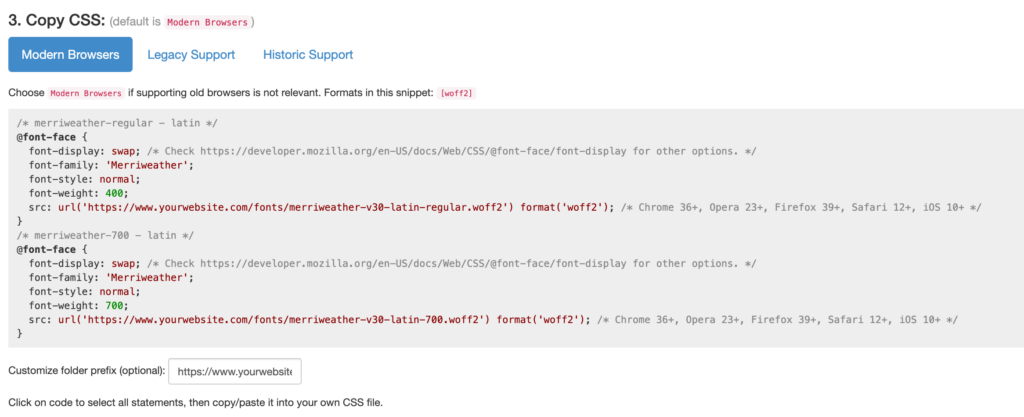
and paste this in your custom CSS style file (my-style.css).